Ръководство за креатори
От акаунта до изплащането: настройване на профил и пакети, отговаряне на запитвания, доставяне и отчитане. Това ръководство минава пътя веднъж. Изображенията са от работещия панел.
Това ръководство като PDF1. Създаване на акаунт и ориентиране
Работното ти място е креаторският панел. Там са профил, пакети, поръчки и отчети — страницата, която марките виждат, възниква от това сама.
Стъпка 1.1
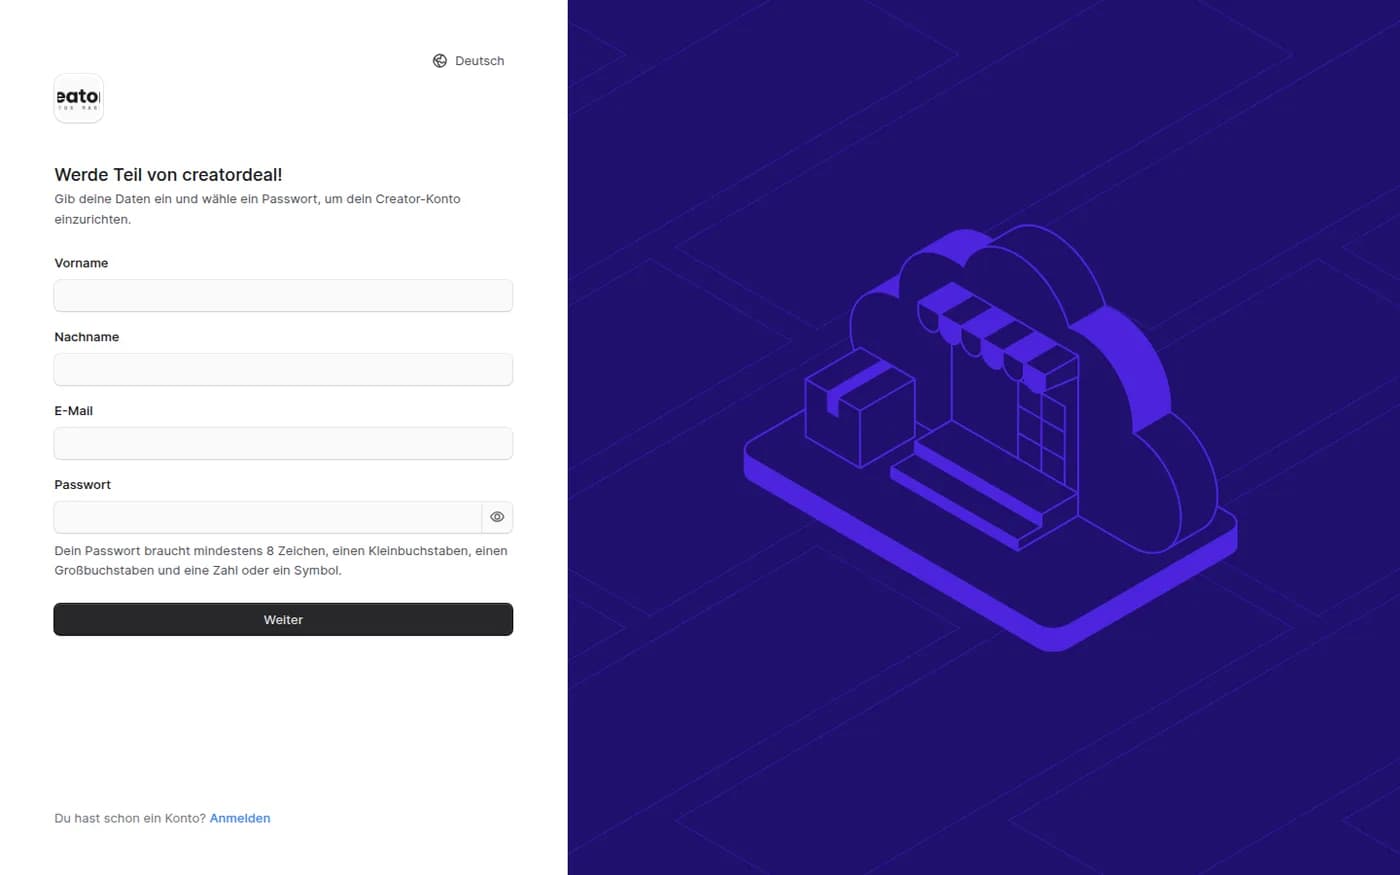
Създай акаунт
Име, фамилия, имейл и парола — повече първата стъпка не иска. Езика на панела настройваш горе вдясно; важи само за теб.
Стъпка 1.2
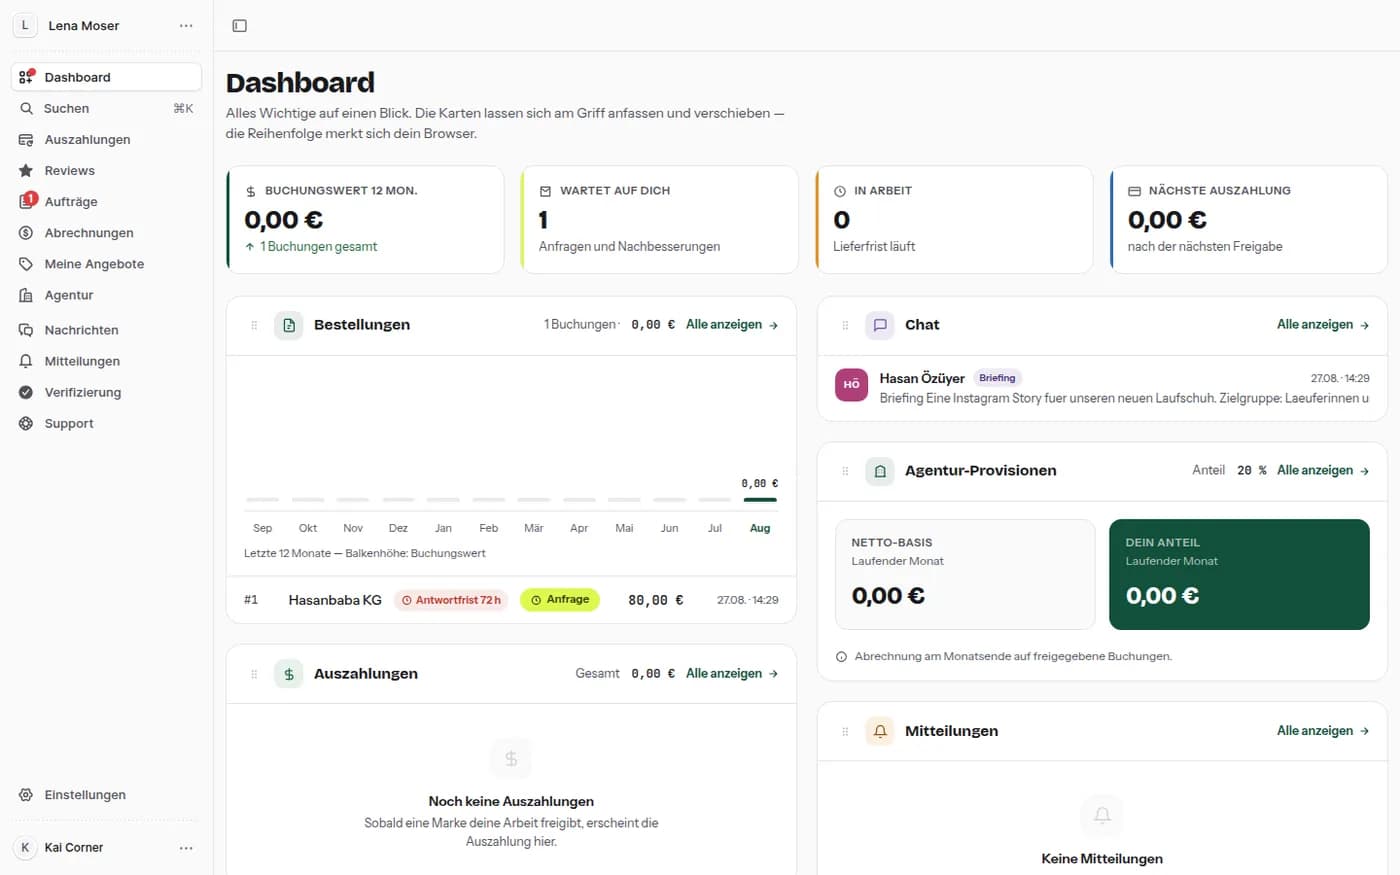
Таблото
Горе четири числа: стойност на резервациите за последните дванадесет месеца, какво те чака, какво е в работа, какво се изплаща следващо. „Чака те“ е точката, в която тече срок. Картите отдолу хващаш за дръжката и местиш.
2. Твоят профил
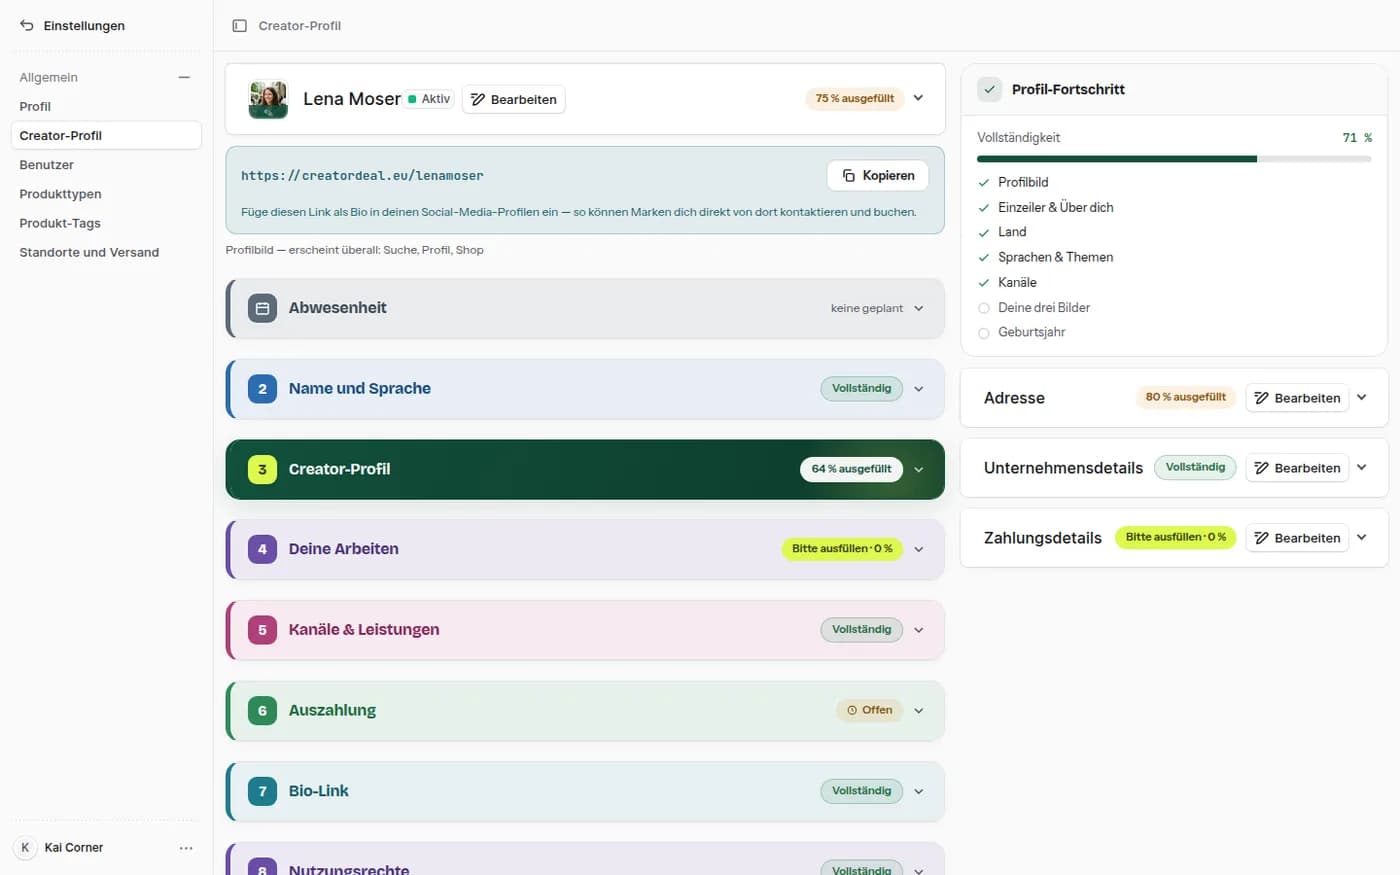
Профилът е разделен на разгъващи се карти и всяка сама казва колко е попълнена. Вдясно е напредъкът с това, което още липсва — марките търсят точно по тези данни.
Стъпка 2.1
Разгъващите се карти
Име и език, креаторски профил, работите ти, канали и услуги, изплащане, био линк, права за ползване, отсъствие. Най-горе стои био линкът ти за копиране.
Стъпка 2.2
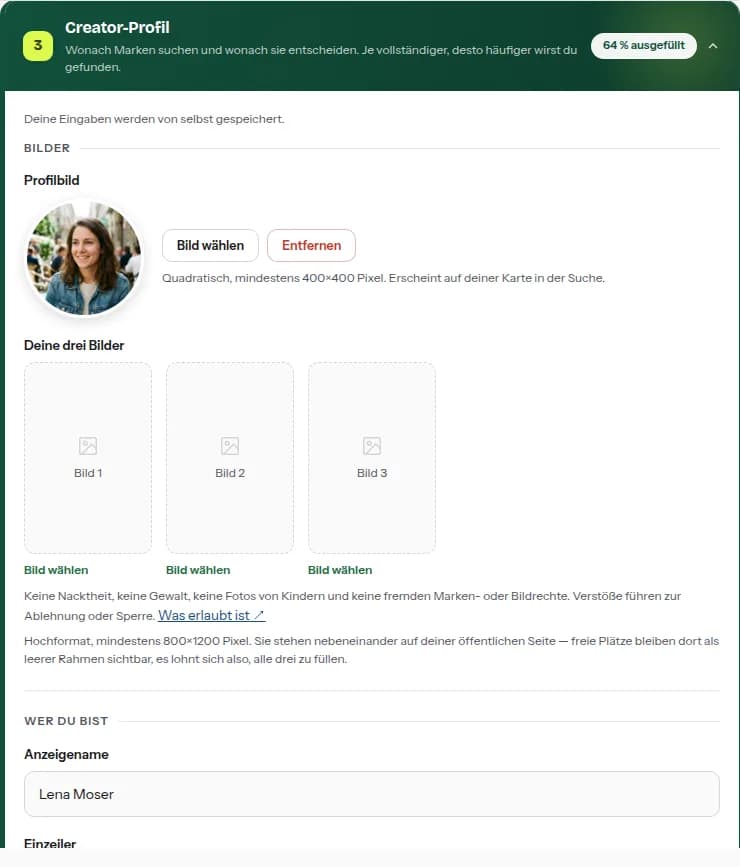
Изображения и текстове
Квадратна профилна снимка и три вертикални изображения, плюс показвано име, едноредово описание и „За теб“. Какво не е позволено на изображенията пише директно при полетата.
3. Канали и услуги
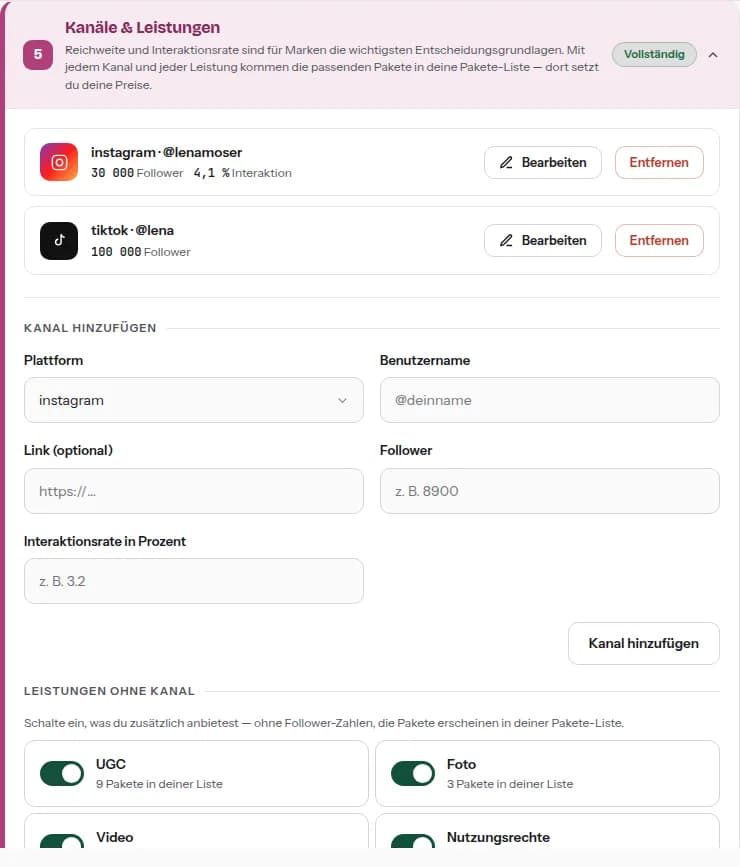
Обхватът и процентът на ангажираност по канал са за марките най-важната основа за решение. Всеки въведен канал допълнително отключва подходящите пакети.
Стъпка 3.1
Добавяне на канал
Платформа, потребителско име, последователи и процент на ангажираност; линк към профила е по желание. Отдолу са услугите без канал — UGC, снимки, видео, права за ползване. Тях включваш с превключвател.
4. Пакети и цени
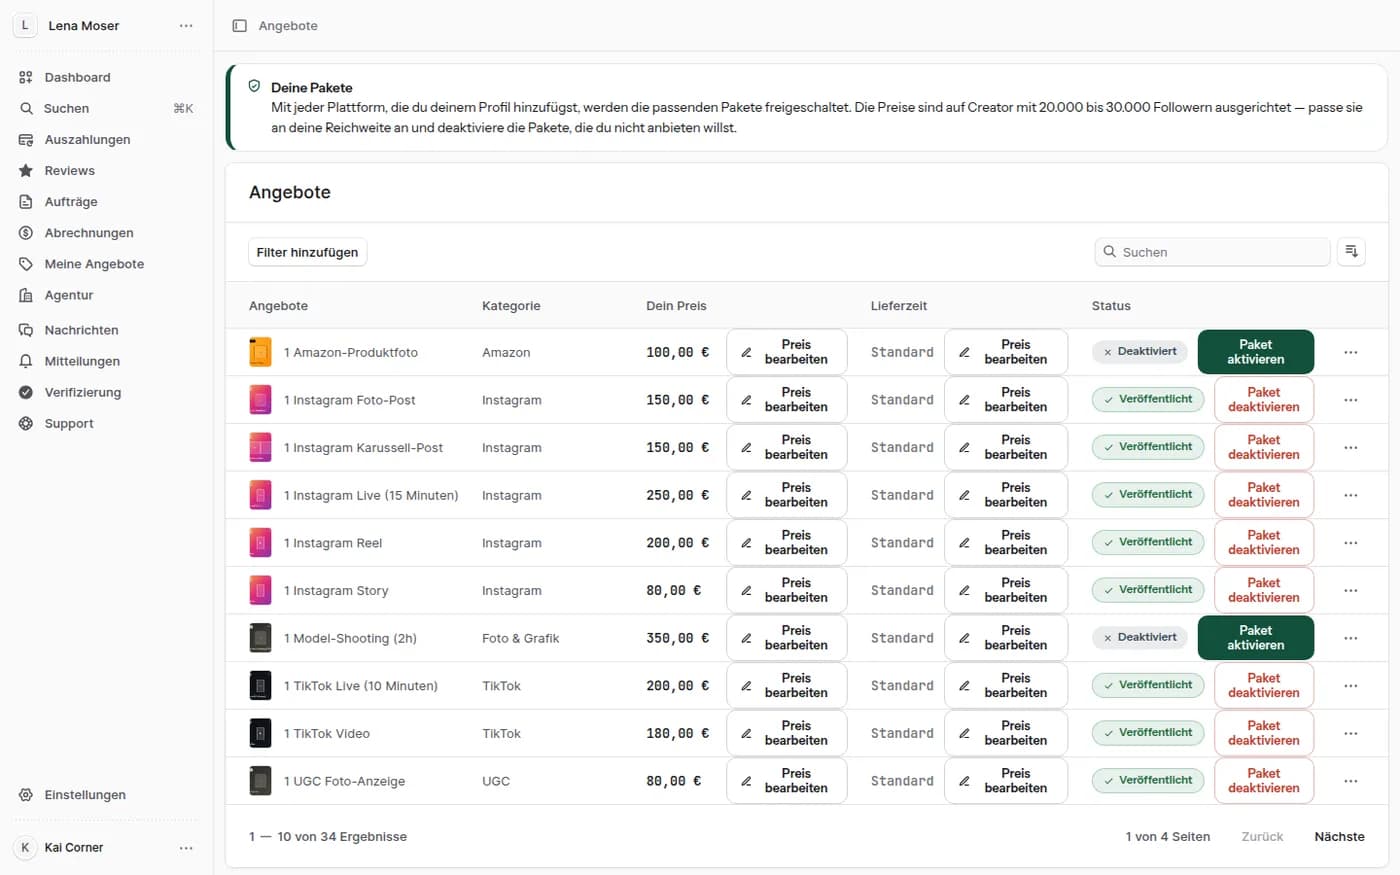
Кои пакети съществуват е зададено; колко струват решаваш ти. Изключен пакет не вижда нито една марка.
Стъпка 4.1
Задаване на цени
По ред: категория, твоята цена, срок за доставка и състояние — плюс „Редактирай цена“ и превключвателя за активиране. Стойностите по подразбиране са сметнати за средни обхвати; който има повече, слага отгоре.
Стъпка 4.2
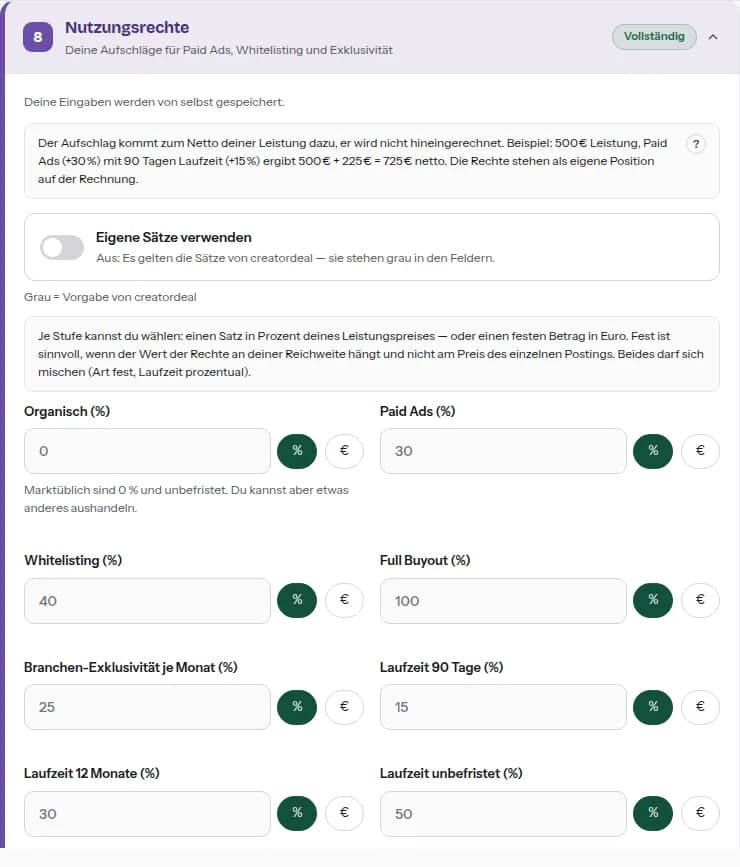
Ценоразписът на правата за ползване
Колко струват при теб paid ads, whitelisting, full buyout, ексклузивност и сроковете — като процент от услугата или като фиксирана сума. Без собствени ставки важат сивите стойности по подразбиране на creatordeal.
5. Био линкът
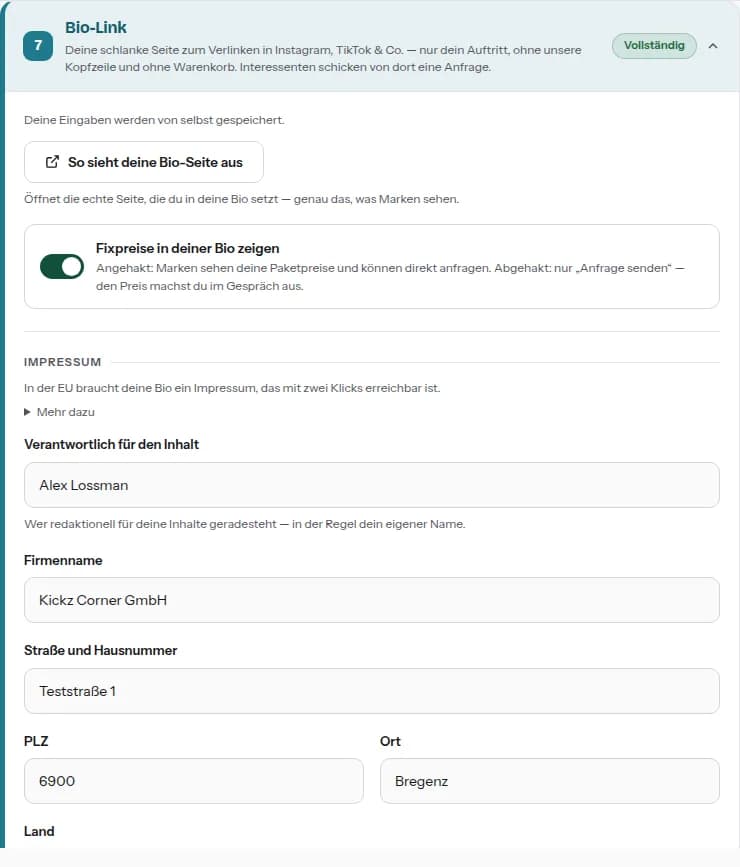
Лека страница без заглавната част на магазина, замислена за биото в Instagram, TikTok и т.н. Оттам ти пишат и марки без акаунт.
Стъпка 5.1
Настройване на страницата
Превключвател решава дали там стоят фиксираните ти цени или само „Изпрати запитване“. Отдолу данните за доставчика: в ЕС трябва да са достъпни от био страницата с два клика.
6. Твоите поръчки
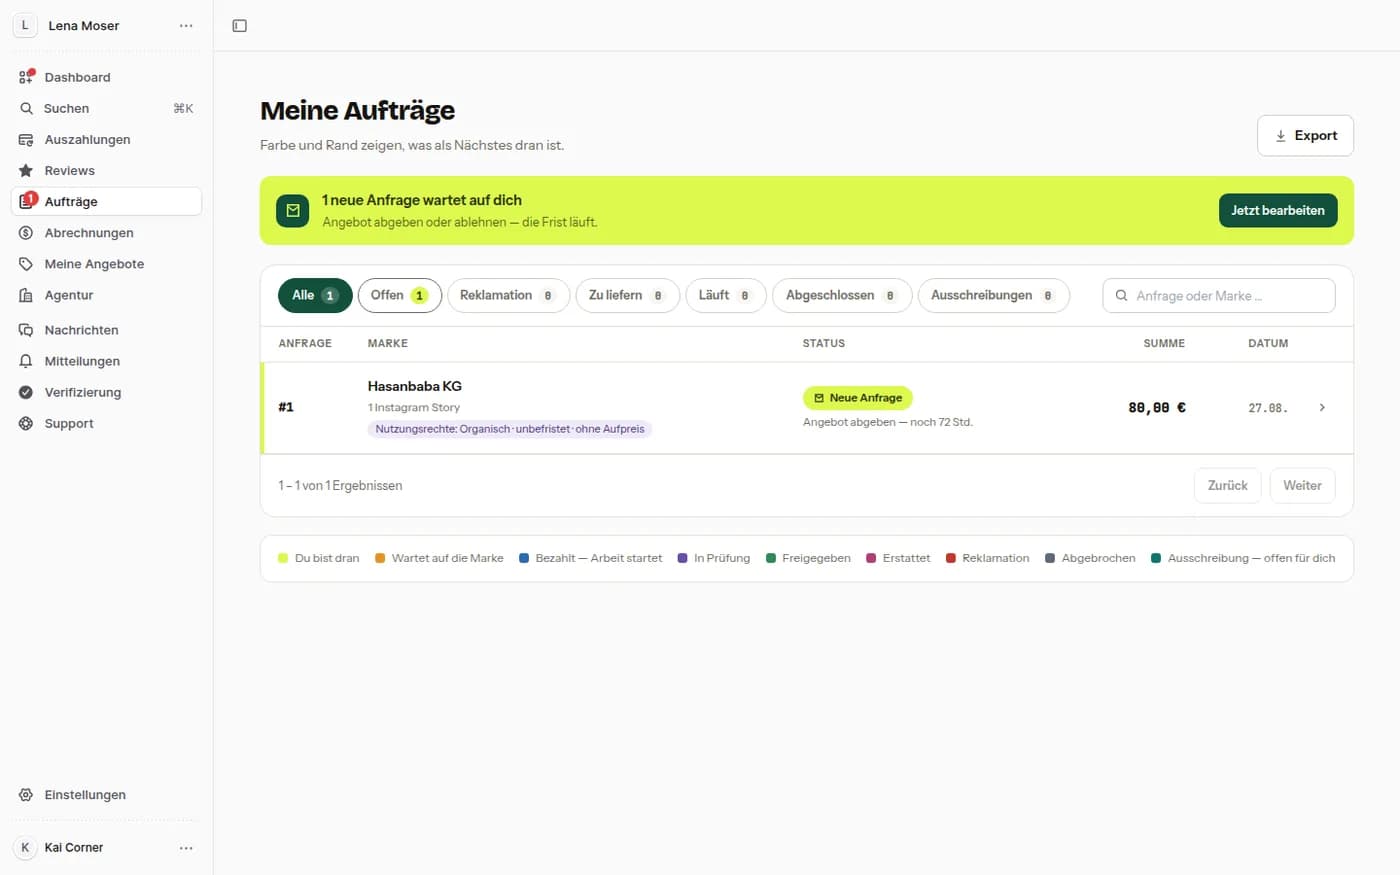
Един списък за всичко. Цветът и рамката показват кое е следващо; разделите отгоре разделят отворени, за доставка, текущи и приключени.
Стъпка 6.1
Списъкът с поръчки
Горе лентата с най-спешното — нови запитвания с течащ срок, отворени възражения. Всеки ред показва марка, пакет, договорени права за ползване, състояние, оставащ срок и сума; легендата отдолу обяснява цветовете.
7. Четене на запитване
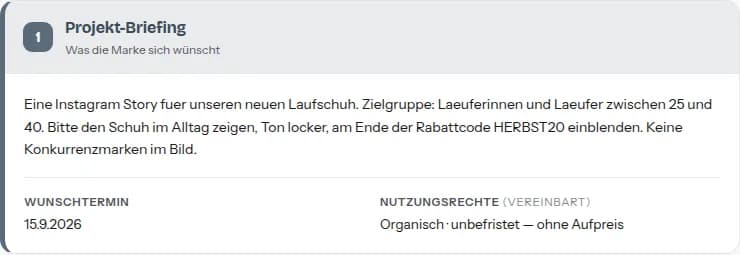
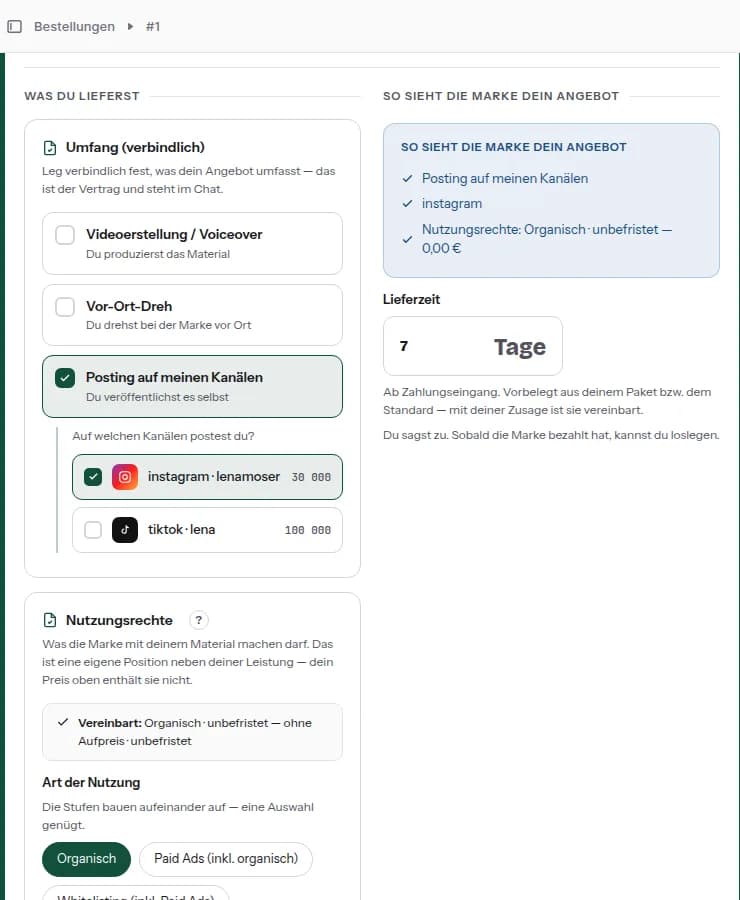
Горе стои какво иска марката; долу какво ти обвързващо обещаваш. Каквото настроиш там, е договорът — после стои в чата и не може тихо да се промени.
Стъпка 7.1
Брифът
Какво трябва да възникне, желаната дата и правата за ползване, които марката е поискала. Липсва ли нещо, попитай в чата, преди да приемеш.
Стъпка 7.2
Обемът
Видеопродукция, снимки на място, публикуване в каналите ти, услуга — а при публикуване и каналите. Вдясно следиш как марката ще прочете офертата ти.
8. Приемане или подаване на оферта
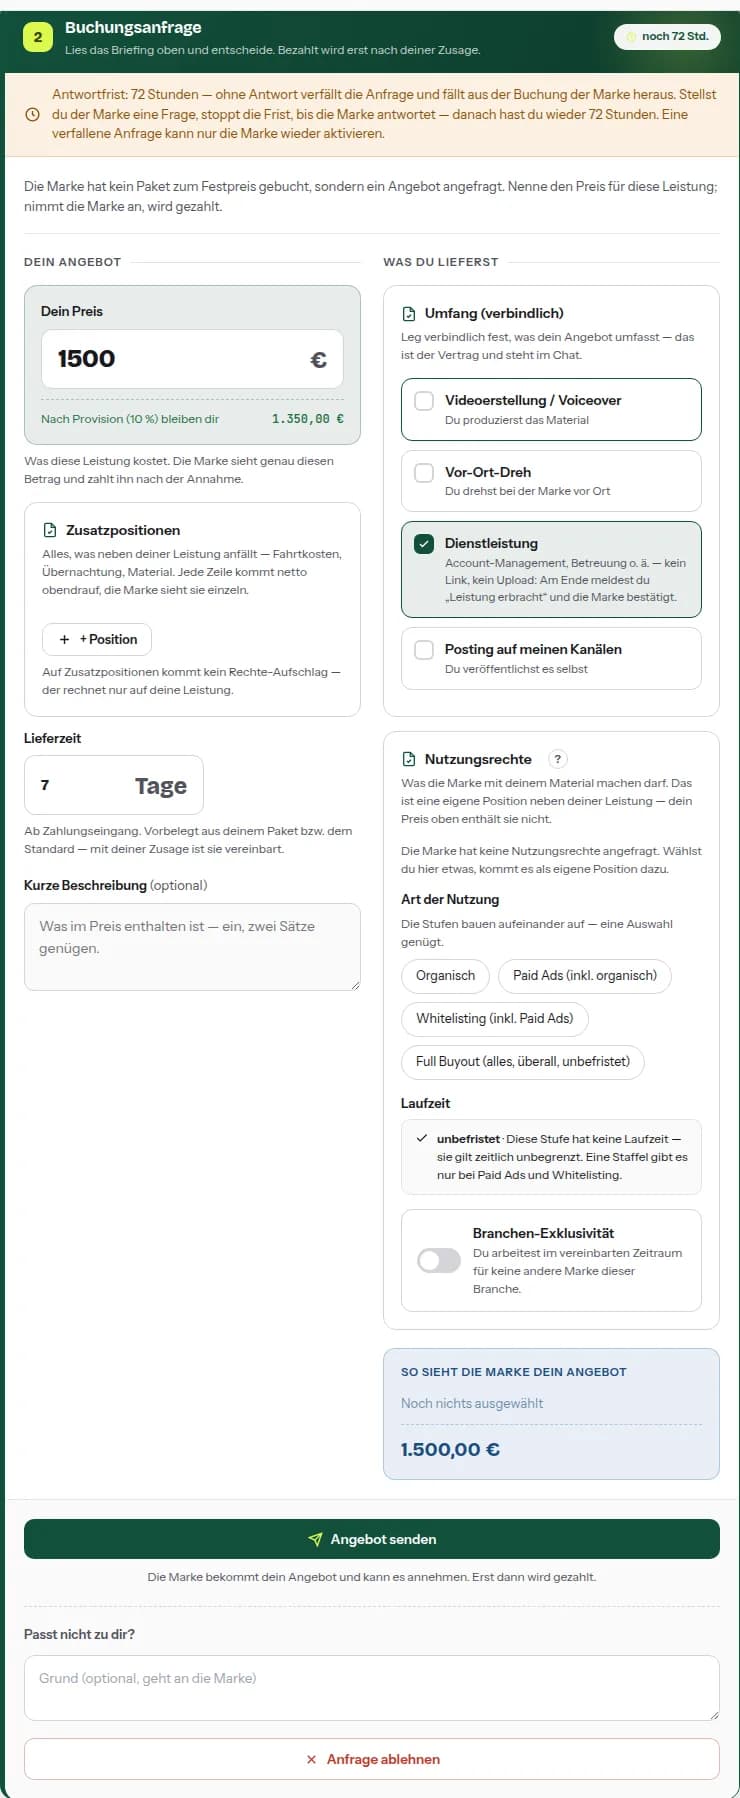
При пакет цената е фиксирана, само приемаш. При запитване за оферта я посочваш сам. За отговора тече срок; без отговор запитването изтича.
Стъпка 8.1
Подаване на оферта
Твоята цена, под нея веднага какво ти остава след комисионата. Можеш да добавиш допълнителни позиции, срок за доставка и кратко описание. Не ти ли пасва, откажи с причина — по-добре от изтекъл срок.
Стъпка 8.2
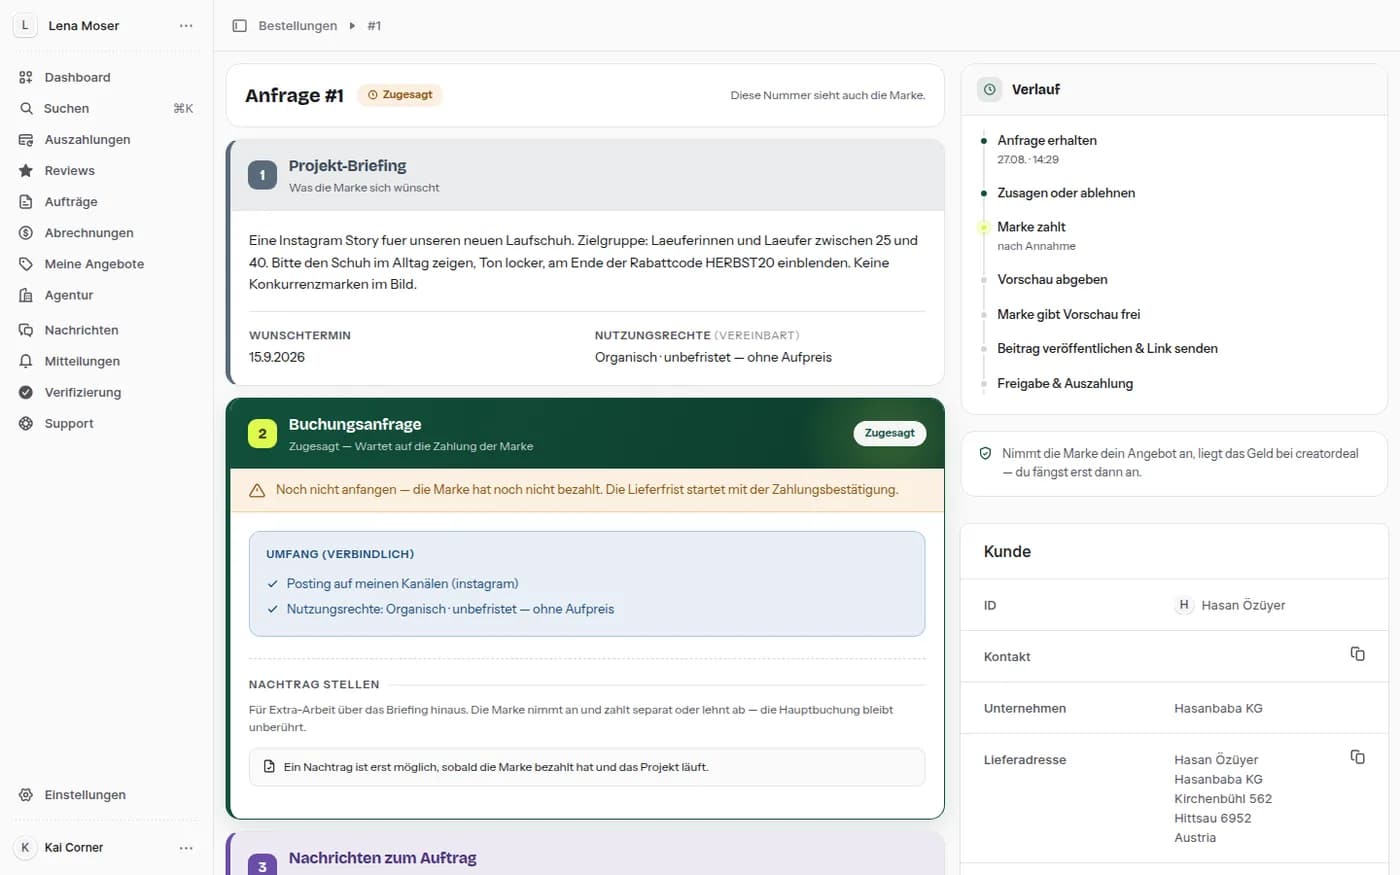
Прието — и сега?
След приемането поръчката стои на „Чака плащането на марката“. Не започвай още: срокът за доставка стартира с потвърждението на плащането. Вдясно тече историята — от запитването до изплащането.
9. Насрещната оферта на марката
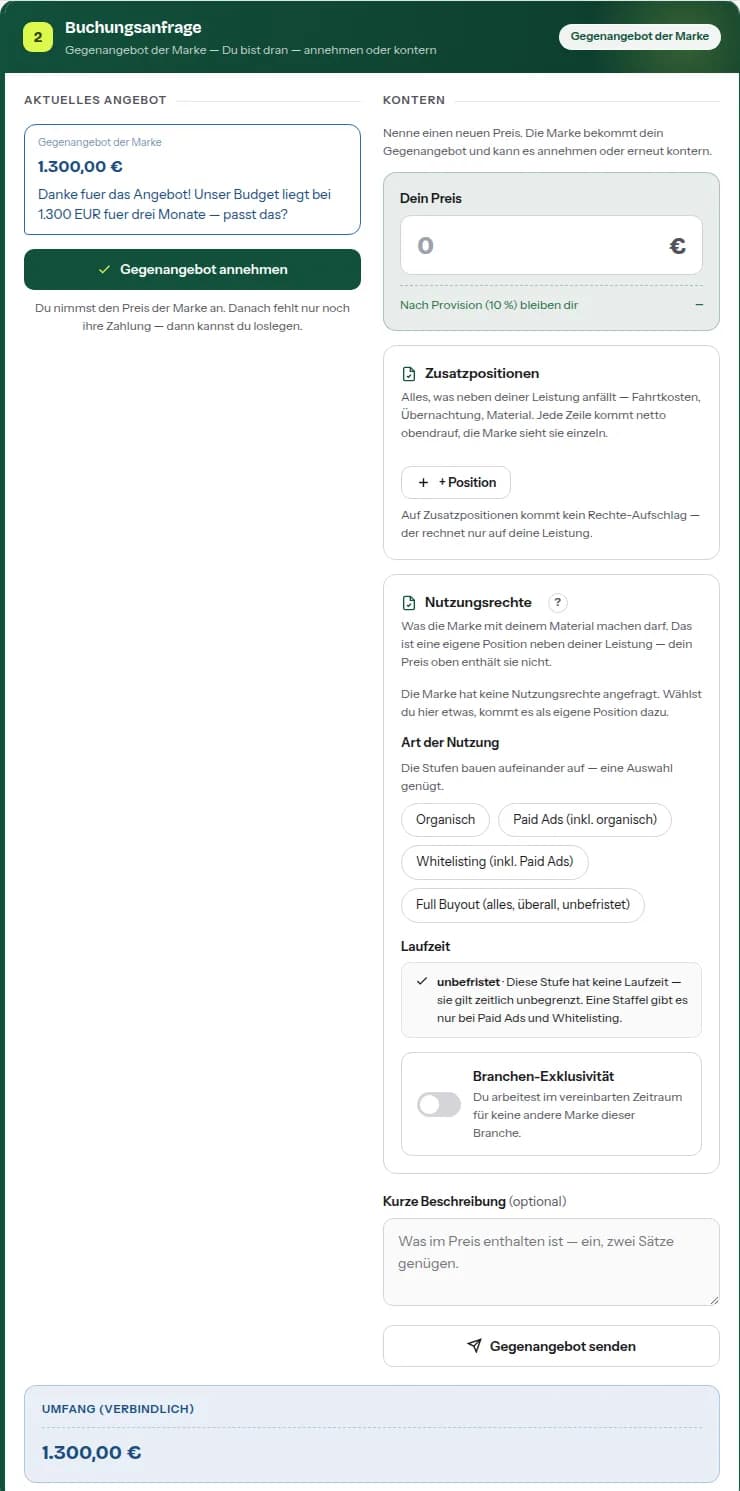
Марката може да противопостави на офертата ти своя цена. Върви напред-назад, докато единият приеме или прекъсне.
Стъпка 9.1
Приеми или контрирай
Вляво насрещната оферта със сума и обосновка, вдясно твоят отговор с нова цена, права за ползване и ред пояснение. Докато марката е на ход, срокът ти за отговор е на пауза.
10. Доставяне: визуализация, после публикация
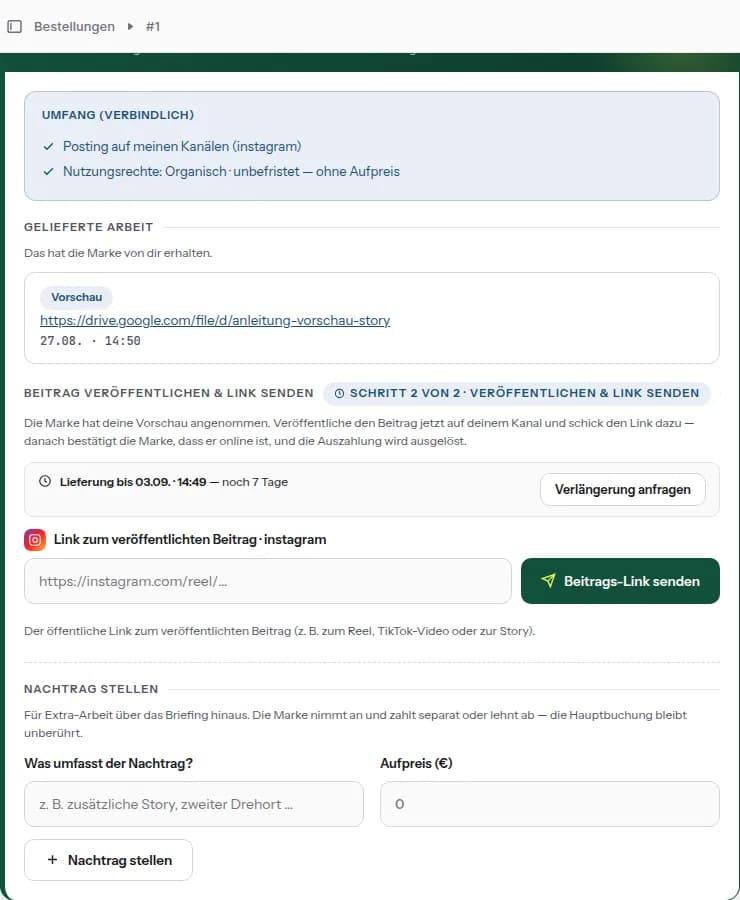
Резервация, която се появява на твоя канал, се доставя в два кръга: първо визуализацията за одобрение, после линкът към публикуваното.
Стъпка 10.1
Предаване на визуализацията
Въведи линка към визуализацията — Drive, Dropbox, WeTransfer или където я държиш. Не линк от този панел: него освен теб никой не може да отвори. Нищо още не е публикувано; марката първо проверява.
Стъпка 10.2
Изпращане на линка към публикацията
Щом марката приеме визуализацията, публикуваш и пращаш публичния линк. После тя потвърждава, че е онлайн — това задейства изплащането. Публикуваш ли в няколко канала, въвеждай линковете един след друг.
11. Услуги: съобщаване на предоставянето
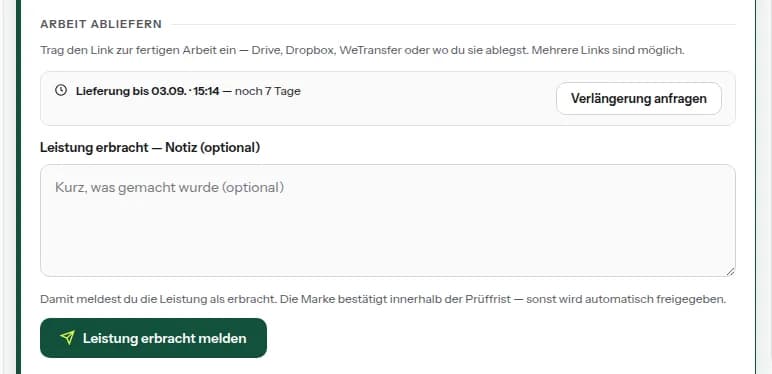
При обем без линк и без файл — консултация, снимки, среща на място — няма какво да се качва.
Стъпка 11.1
Съобщаване вместо качване
Кратка бележка е по желание; бутонът се казва „Съобщи предоставена услуга“. После марката има срок за проверка — без възражение се освобождава автоматично.
12. Подаване на допълнение
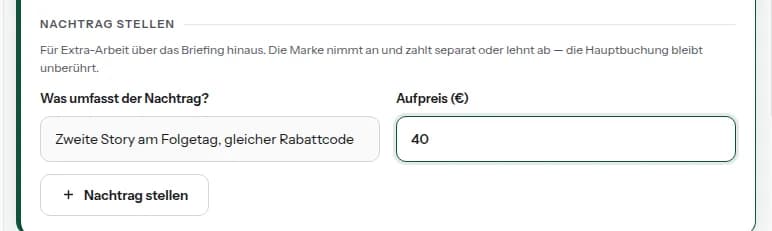
За допълнителна работа извън брифа. Допълнението виси на същата резервация, но се решава и плаща отделно.
Стъпка 12.1
Отчитане на допълнителна работа
Опиши какво се добавя и посочи доплащането. Марката приема и плаща отделно или отказва; основната резервация остава незасегната. Възможно е, докато проектът върви — преди плащането и след приключването не.
13. Обяви
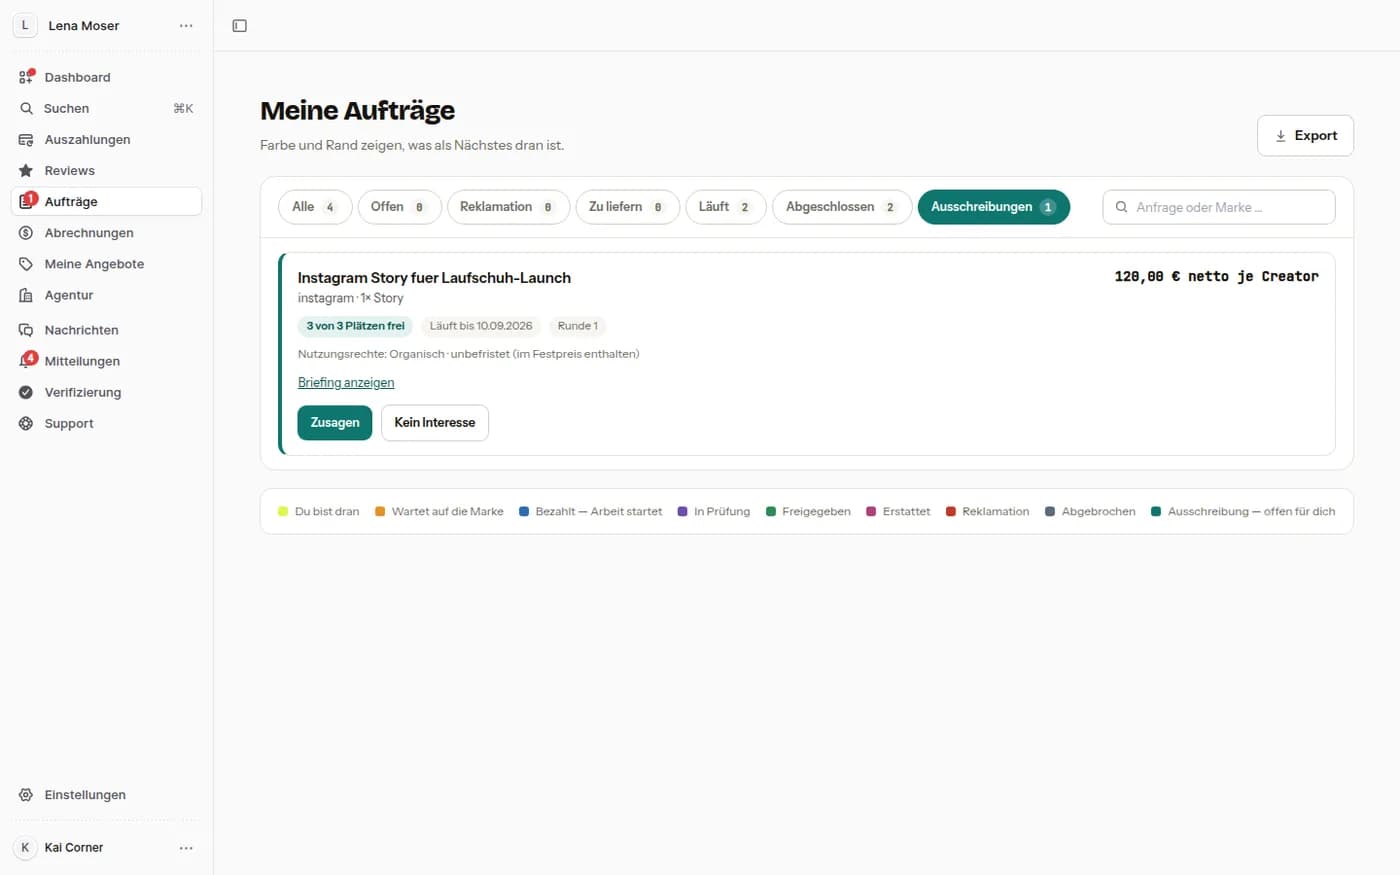
Марките публикуват обяви, вместо да питат поединично. Виждаш само обявите, в чиято целева група пасваш.
Стъпка 13.1
Приеми или пропусни
В раздела „Обяви“ стоят платформа, формат, цена на креатор, свободни места, срок и включените права за ползване; „Покажи брифа“ разгъва текста. При фиксирана цена приемаш, при „Събери оферти“ даваш цена. Плаща се събирателно, когато марката затвори обявата.
14. Отчети
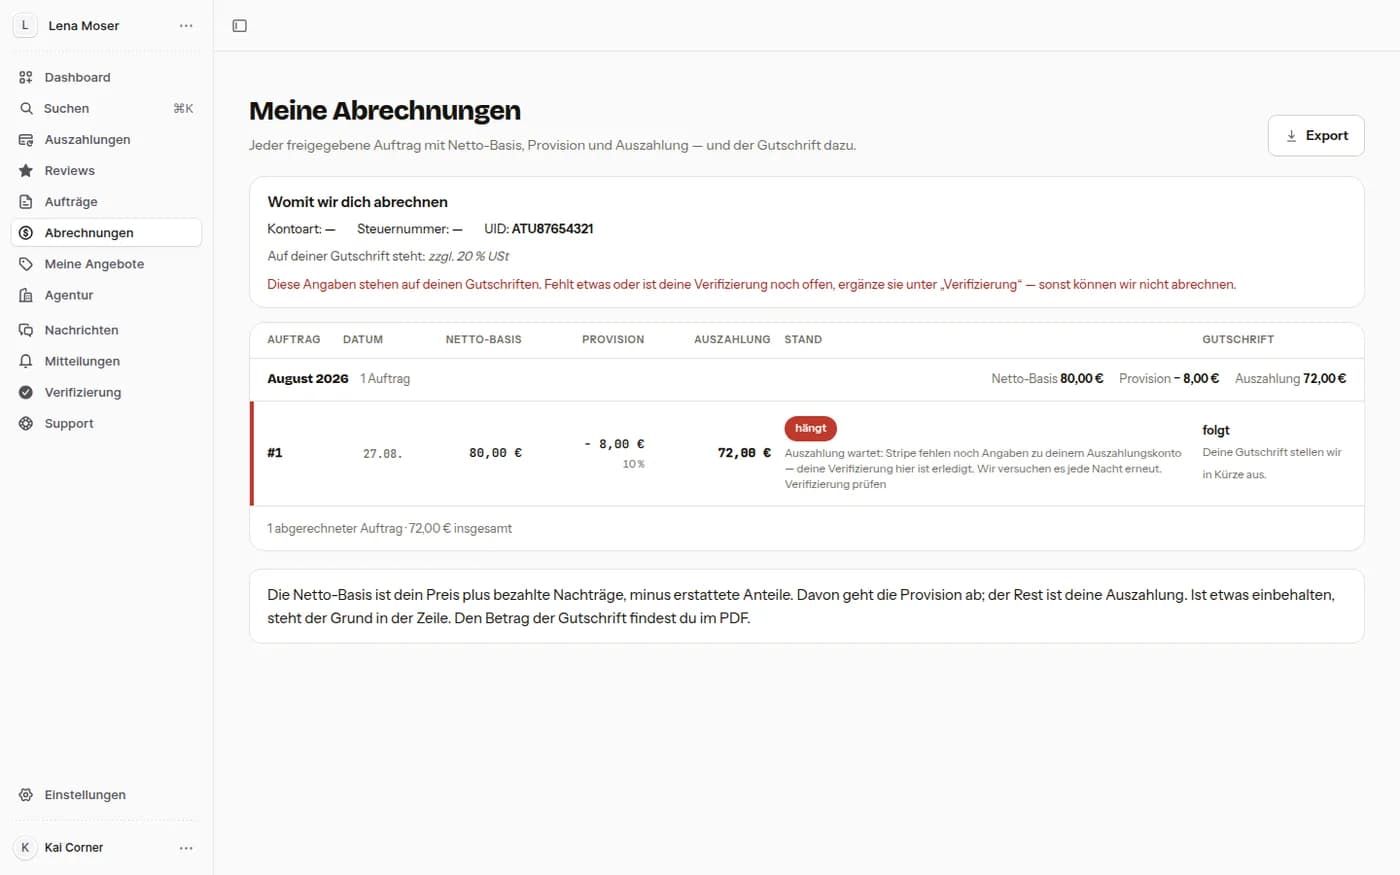
Какво става с освободена поръчка: нетна база, комисиона, твоето изплащане — и кредитното известие към него.
Стъпка 14.1
Какво идва и кога
По ред за поръчка с дата, база, комисиона, изплащане и състояние. Горе пише с какви данни те отчитаме; ако нещо липсва, указанието казва къде да го допълниш. „Експорт“ тегли списъка като файл.
15. Верификация и сметка за изплащания
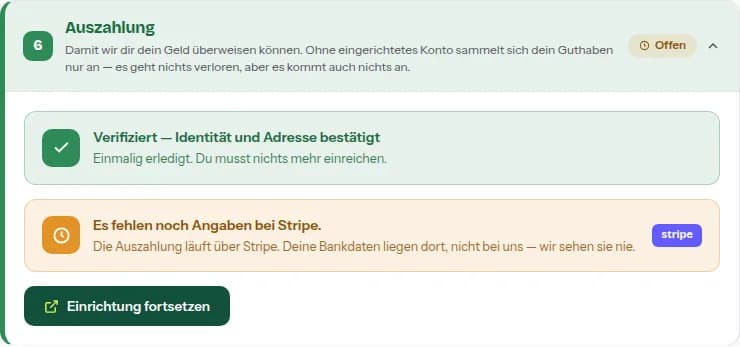
Две неща трябва да са свършени еднократно, преди да потекат пари: верификацията при нас и начин на изплащане — Stripe, банкова сметка или PayPal. Липсва ли едното, салдото ти само се трупа.
Стъпка 15.1
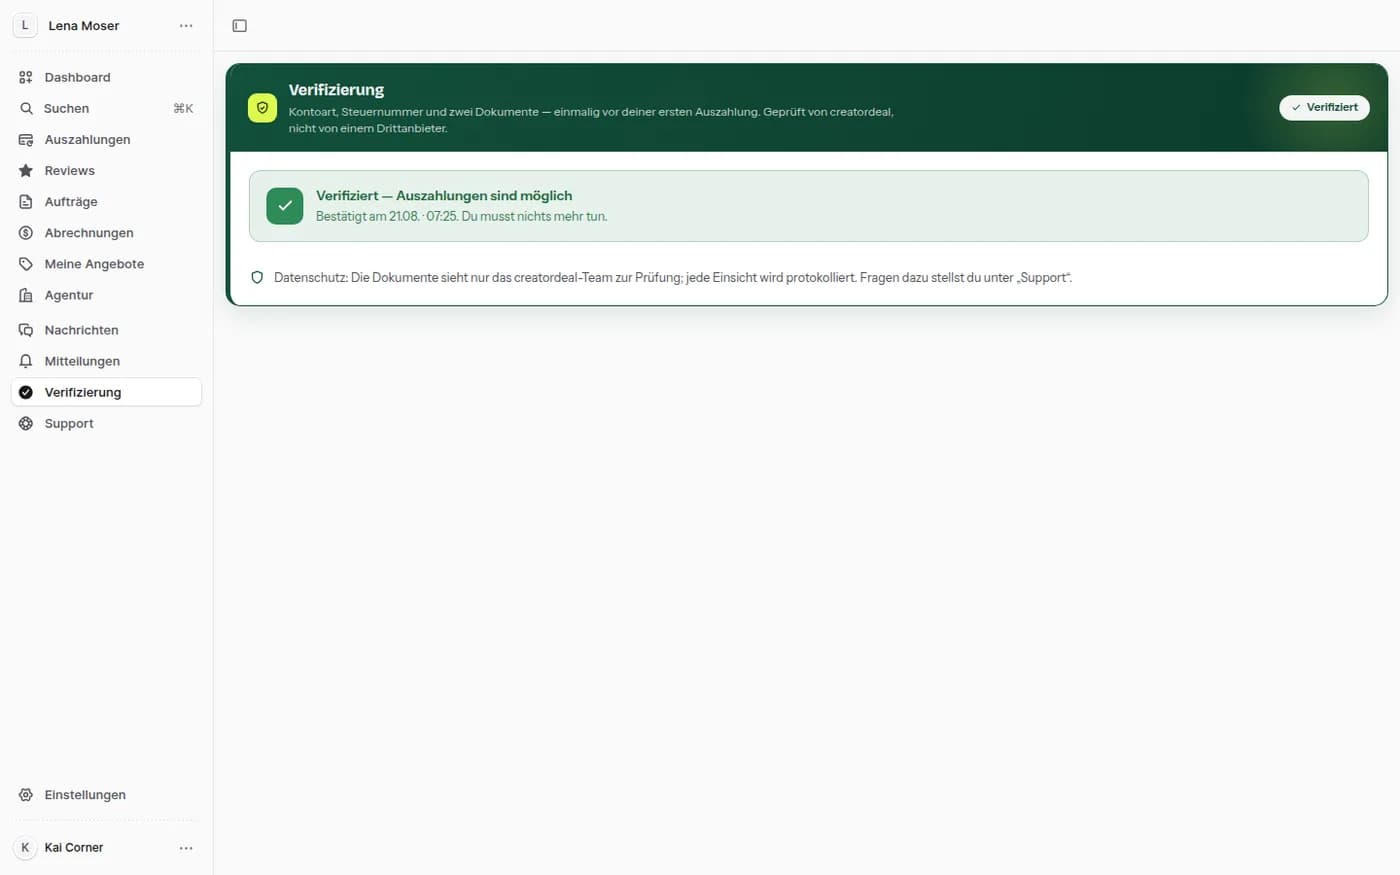
Верификация
Тип акаунт, данъчни данни и документите към тях — проверява creatordeal, не трета страна. Документите вижда само екипът за проверка, всеки достъп се протоколира. Веднъж потвърдено, никога повече.
Стъпка 15.2
Сметка за изплащания
Избираш как да ти се плаща: чрез Stripe (банковите ти данни тогава са при Stripe), с банков превод или към PayPal. Изплаща се винаги в евро. След промяна на данните за изплащане за твоя защита важи блокировка от 72 часа. Ако още нещо липсва, пише го в картата „Изплащане“.
16. Отсъствие
Който е в отпуск, не бива да изпуска срок.
Стъпка 16.1
Въвеждане на отпуск
Въведи периода, в който не работиш. Марките те виждат тогава като отсъстващ — по-добре от запитване, чийто срок за отговор изтича, докато те няма.
